
You can improve your running performance and reduce injury risk in just 10 to 15 minutes a day by adding targeted mobility exercises to your training routine. These dynamic movements focus on increasing the range of motion in your hips, ankles, and thoracic spine while activating the muscles that stabilize your stride. Unlike static stretching before a run, mobility work trains your body to move through its full range of motion with control and strength.
Most runners spend their training time focused on mileage, speed work, and maybe some strength training. But if you’ve ever felt that nagging tightness in your hips after a long run, struggled with recurring IT band issues, or noticed your stride getting shorter as you fatigue, limited mobility is likely part of the problem. Sarah, a marathon runner from Portland, put it perfectly when she told me: “I could run 40 miles a week, but I couldn’t sit cross-legged on the floor without discomfort. Once I started doing mobility work three times a week, not only did my hip pain disappear, but my stride felt smoother and more powerful.”
The difference between flexible and mobile is crucial. Flexibility means your muscles can lengthen passively, while mobility means you can actively control that range of motion under load. For runners, this distinction matters because every stride requires controlled movement through multiple joints simultaneously. When one area lacks mobility, your body compensates elsewhere, creating inefficient movement patterns that waste energy and increase injury risk.
This guide walks you through a complete mobility routine designed specifically for runners, with detailed instructions for each exercise, modifications for different ability levels, and clear benchmarks to track your progress.
What You’ll Need to Get Started
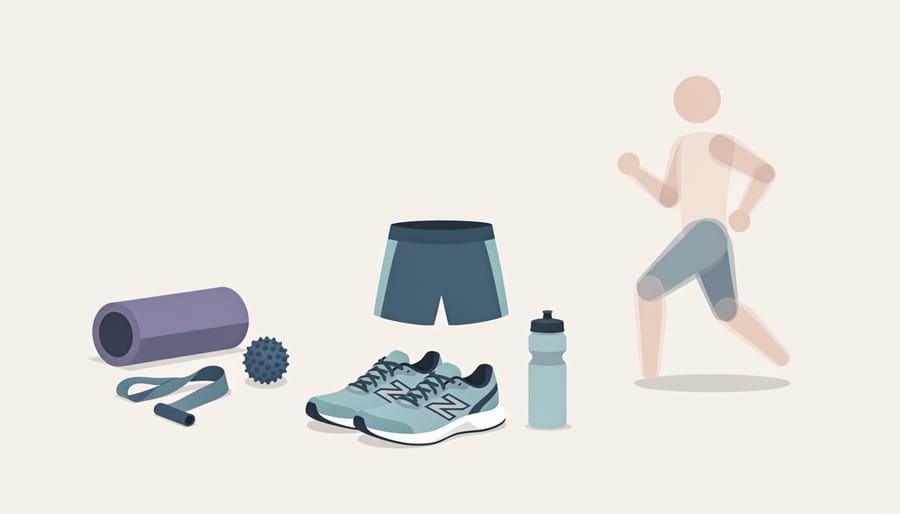
You don’t need a fancy home gym to start improving your mobility. Most runners already have everything required, and if you’re missing a few items, the total investment runs under fifty dollars. The beauty of mobility work lies in its simplicity, your own bodyweight provides the resistance for most movements, and a quiet corner of your living room offers plenty of space.
Here’s what will support your practice:
- Yoga mat or towel, cushions joints during floor exercises and prevents slipping
- Foam roller, releases muscle tension and prepares tissues for deeper mobility work
- Resistance band (light to medium), adds controlled resistance for shoulder and hip exercises
- Massage ball or lacrosse ball, targets specific tight spots that foam rollers can’t reach
- Wall space, essential for ankle mobilizations and balance work
The mat and foam roller will see the most use, but you can substitute a folded blanket and use your floor if needed. Resistance bands cost around ten dollars and last for years. Massage balls are optional, nice to have but not essential when you’re starting out.
Set aside a space about six feet by three feet where you can lie down and move your arms freely. That’s it. No fancy equipment, no expensive classes, no excuses. The low barrier to entry means you can begin tonight, right after your next run, with whatever you have on hand.
Important Safety Guidelines Before You Begin
Mobility work can transform your running, but only when done correctly. Before you roll out your mat, understand these essential safety principles to protect yourself from injury and maximize the benefits of your practice.
The most important distinction you need to make is between productive discomfort and pain signals. Productive discomfort feels like a pulling or stretching sensation that you can breathe through and that eases slightly as you hold a position. Pain, on the other hand, feels sharp, shooting, burning, or causes you to tense up involuntarily. If you feel pinching in a joint, numbness, tingling, or any sensation that makes you catch your breath, you’ve gone too far.
Never attempt deep static stretching on cold muscles. Your body needs at least five minutes of light movement, like walking or easy jogging, to increase blood flow and tissue temperature before you work on range of motion. Think of your muscles like taffy: when warm, they’re pliable and responsive; when cold, they’re stiff and prone to tearing.
If you’re dealing with an acute injury, meaning something that happened within the last 48-72 hours and is still inflamed or swollen, skip mobility work in that area entirely. Ice, rest, and gentle movement are your priorities first. Similarly, if you have a diagnosed condition like a labral tear, severe arthritis, or recent surgery, consult a physical therapist before starting any mobility routine.
Watch for signs you’re overdoing it: increased soreness that lasts more than 24 hours, reduced range of motion the next day, or persistent aching in joints rather than muscles. Mobility work should leave you feeling looser and more comfortable, not beat up.
Understanding Mobility vs. Flexibility for Runners

Before you dive into the exercises, let’s clear up a common confusion that trips up many runners: mobility and flexibility aren’t the same thing, and the difference matters for your training.
Flexibility is your passive range of motion, how far you can move a joint when something else is doing the work. Think of sitting on the floor and pulling your toes toward your nose with your hands. Your hamstrings might stretch impressively, but that’s flexibility. You’re not controlling the movement; your arms are.
Mobility is your active range of motion under control. It’s how far you can move a joint using only your own muscle strength and coordination. Instead of pulling your toes toward you, mobility would be lifting your foot toward your shin using just your muscles while maintaining balance and stability.
Here’s why this distinction matters when you’re logging miles: running demands controlled movement through full ranges of motion, not passive stretching. When your leg swings back during stride, you need strong hip extension that you can control and repeat thousands of times. When your foot lands, you need ankle dorsiflexion, your shin moving over your foot, with stability and power to absorb impact and spring forward.
A runner who can do the splits (impressive flexibility) but lacks hip mobility might still experience tight, inefficient strides. Meanwhile, a runner with solid mobility can access their range of motion dynamically, exactly when their running gait demands it.
The mobility exercises coming up train your body to own its movement patterns, not just passively reach them.
Step-by-Step Mobility Workout Routine for Runners
Ankle and Foot Mobility Drills
Your ankles take thousands of impacts every run, yet they’re often the most neglected part of mobility training. Stiff ankles force your calves and shins to work overtime, setting you up for shin splints and reducing the power you generate with each push-off. These three drills take five minutes and directly address the mobility patterns your feet and ankles need for efficient running.
Ankle Circles
Sit with one leg extended. Lift your foot slightly off the ground and slowly trace large circles with your toes, moving only from the ankle joint. Complete 10 circles in each direction, making them as wide as possible. Keep your leg still, all the movement happens at the ankle. This simple drill wakes up the small stabilizing muscles that control your foot placement during landing.
Toe Yoga
Stand barefoot and practice lifting just your big toe while keeping the other four toes planted, then reverse it. This feels impossible at first. Work up to 10 controlled lifts each way per foot. Toe yoga strengthens the intrinsic foot muscles that support your arch and prevent your foot from collapsing inward during the landing phase of your stride.
Wall Ankle Mobilization
Face a wall with one foot forward, knee bent. Keep your heel down and drive your knee forward toward the wall, feeling a stretch through your Achilles and calf. Hold for two seconds, release, and repeat 15 times. Gradually move your foot farther from the wall as your range improves. Better ankle dorsiflexion means your shin can move forward over your foot more easily, reducing strain on your calf and allowing a more powerful push-off.
Hip Mobility Exercises
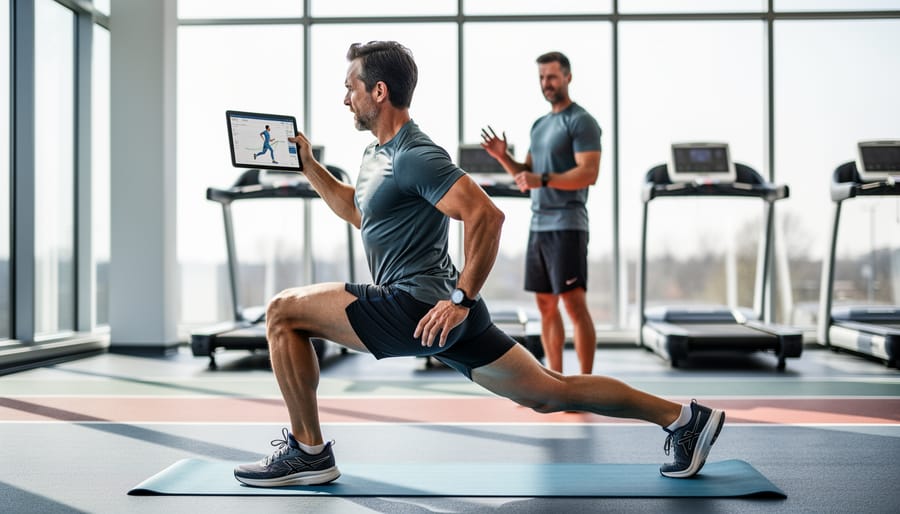
Your hips are the engine that drives your running stride, and restricted hip mobility costs you both speed and efficiency with every step. When your hips can’t move freely through their full range, your body compensates with shorter strides, increased ground contact time, and unnecessary tension in your lower back and knees.
Start with the 90/90 hip stretch. Sit on the floor with your right leg bent 90 degrees in front of you, knee pointing right, and your left leg bent 90 degrees behind you, knee pointing left. Keep your spine tall and both sit bones grounded. Lean forward over your front leg, feeling the stretch in your right hip’s external rotators. Hold for 45 seconds, breathing deeply into the tight spots. Switch sides. This position targets the often-neglected muscles deep in your hip socket that control rotation during your stride.
The world’s greatest stretch lives up to its name for runners. Step your right foot forward into a lunge. Place both hands on the ground inside your right foot. Drop your left elbow toward the ground near your right instep, then rotate your right arm toward the sky, following it with your eyes. Return to start and repeat six times per side. This sequence opens your hip flexors, thoracic spine, and groin simultaneously while challenging your stability.
Hip CARs (controlled articular rotations) teach your nervous system to access your full hip range. Stand on your left leg, lift your right knee to hip height, then slowly rotate it outward in the largest circle possible, moving only from the hip joint. Complete five circles forward, then five backward. Keep your torso stable throughout. The goal is control, not speed.
For a runner-friendly pigeon pose variation, start in a plank position. Bring your right knee forward and place it behind your right wrist, with your right ankle angled toward your left hip. Lower down onto your forearms or all the way to the ground. Hold for 90 seconds per side, letting gravity do the work while you breathe steadily. This addresses the deep hip external rotators that tighten from repetitive forward motion.
Finally, the standing hip flexor mobilization targets the muscles most shortened by sitting and running. Kneel on your left knee with your right foot forward. Tuck your pelvis under slightly, squeeze your left glute, then shift your weight forward until you feel a stretch down the front of your left hip. Reach your left arm overhead and lean slightly right to intensify. Hold for 45 seconds per side.
These five movements directly improve your ability to extend your hip behind you during toe-off and flex it forward during swing phase, the two actions that determine your stride length and the efficiency of every mile you run.
Thoracic Spine and Upper Body Mobility

Your upper body might not touch the ground when you run, but tight shoulders and a stiff mid-back directly impact your stride efficiency and breathing. When your thoracic spine can’t rotate freely, your arm swing becomes restricted, forcing your legs to work harder to maintain pace. Limited shoulder mobility also cramps your rib cage, reducing how much oxygen you can pull in during hard efforts.
Thoracic Rotation (Book Openers)
Lie on your side with knees bent at 90 degrees and arms extended in front of you, palms together. Keep your bottom knee anchored to the ground as you slowly open your top arm across your body, following it with your eyes until your upper back touches the floor. Your hips should stay stacked throughout the movement. Hold the open position for three breaths, then return. Complete 8 repetitions per side, focusing on rotating from your mid-back rather than just flopping your arm over.
Cat-Cow for Runners
Start on hands and knees with wrists under shoulders. On the exhale, round your spine toward the ceiling, tucking your chin and tailbone. On the inhale, drop your belly, lift your chest and gaze forward. The runner-specific variation: pause in the arched position and take three full breaths, expanding your rib cage in all directions. Perform 10 slow cycles, treating this as breathing practice, not just a stretch.
Shoulder Dislocates with Band
Hold a resistance band or towel with a wide grip in front of your thighs. With straight arms, slowly raise the band overhead and continue the arc behind you until it reaches your lower back. Reverse the movement. Keep your elbows locked and ribs down. Complete 15 repetitions, gradually narrowing your grip over weeks as mobility improves.
Thread-the-Needle Stretch
From hands and knees, reach your right arm underneath your left side, lowering your right shoulder and ear toward the floor. Your hips stay level and pointing forward. Hold for 30 seconds, breathing into the stretch along your shoulder blade and upper back. Repeat on the other side. This releases the muscles between your shoulder blades that get locked up from desk work and driving.
Dynamic Movement Integration
These two dynamic flows tie together everything you’ve practiced in the previous exercises, creating movement patterns that mirror running’s coordinated demands.
Walking Spiderman with Rotation: Start in a push-up position. Step your right foot outside your right hand, keeping your left leg straight behind you. Drop your hips toward the floor, feeling the hip flexor stretch on your left side. Now rotate your right arm up toward the ceiling, following it with your eyes. Hold for two seconds, return your hand to the floor, step back to push-up position, and repeat on the left side. Complete 5 reps per side. This flow opens your hips, activates your glutes, and mobilizes your thoracic spine simultaneously, exactly what happens when you run.
Inchworm to Downward Dog: Stand tall, hinge at your hips, and walk your hands forward until you’re in a push-up position. From there, press your hips up and back into downward dog, pushing your heels toward the floor to stretch your calves and hamstrings. Hold for three breaths, then walk your hands back to your feet and stand up. That’s one rep; do 4-6 total. This sequence prepares your posterior chain and shoulders for the repetitive, ground-reactive forces of running while reinforcing proper hip hinge mechanics.
When and How Often to Do Your Mobility Work
The sweet spot for mobility work is right after your run, when your muscles are warm and receptive to movement. You’ll get the most benefit spending 10-15 minutes on the hip, ankle, and thoracic exercises outlined earlier while your body temperature is still elevated. This post-run window allows you to address the specific areas your run just challenged.
For frequency, aim for a minimum of three sessions per week if you’re just starting out. Runners who practice mobility daily, even for just 10 minutes, see the fastest improvements in range of motion and running comfort. Think of it like brushing your teeth, short, consistent sessions beat occasional marathon stretching binges.
Dynamic mobility drills work differently. Save movements like leg swings, walking lunges with rotation, and ankle circles for your pre-run warm-up. These prepare your joints for running without the deep holds that can temporarily reduce muscle tension you actually need for performance.
Here’s how mobility fits into a typical week for someone following a training plan schedule:
Monday (easy run): 12 minutes post-run mobility focusing on hips and ankles
Tuesday (speed work): 5 minutes dynamic pre-run, 10 minutes static post-run
Wednesday (rest day): 15-20 minute full mobility session
Thursday (easy run): 12 minutes post-run mobility
Friday (rest): 10 minutes mobility or complete rest
Saturday (long run): 15 minutes post-run with extra emphasis on areas that felt tight
Sunday (recovery run or rest): Light 10-minute session or rest
If you’re following a structured program like the Hal Higdon plan slot mobility work into your cross-training days or immediately after your prescribed runs. The key is consistency, not perfection.
How to Know Your Mobility Workout Is Working
You’ll see progress in two ways: through specific tests you can repeat every couple of weeks, and through how running feels day to day.
Start with these functional assessments. For squat depth, stand with feet shoulder-width apart and lower into a squat while keeping your heels down, improved hip and ankle mobility means you’ll descend deeper without your torso pitching forward. The toe-touch test is straightforward: stand with legs straight and reach toward your toes, noting how far down your shins or feet you can comfortably reach. For hip rotation, sit on the floor with one leg straight and the other bent at 90 degrees to the side (like the first position in 90/90 stretches), you should gradually achieve this position with less effort and discomfort. Test ankle dorsiflexion by standing facing a wall with your toes about four inches away, then try to touch your knee to the wall without lifting your heel; as mobility improves, you’ll move your foot farther back while still making contact.
Beyond formal tests, watch for these real-world improvements:
- Your warm-up feels easier and you’re ready to run at target pace sooner
- Your stride feels smoother with less stiffness through the hips
- Post-run tightness diminishes or disappears entirely within an hour
- Those nagging aches in your knees, IT band, or lower back become less frequent
- You maintain better form late in runs when fatigue sets in
- Your breathing feels less restricted during harder efforts
Timeline-wise, expect subtle changes within two weeks, maybe you bend a bit farther in the toe-touch or notice your hips feel looser after your mobility session. The real transformation happens around six weeks of consistent practice, when improvements start showing up during actual runs. You might find yourself hitting splits on your pace chart with less perceived effort, or recovering faster between workout days.
Common Mistakes Runners Make with Mobility Training
The biggest mistake runners make is abandoning mobility work the moment they feel good. You’re pain-free, so you skip a few sessions, then a few more, and suddenly that familiar hip tightness returns. Mobility is preventative maintenance, not crisis management. Keep it in your routine even when everything feels perfect.
Bouncing through movements might feel productive, but you’re training momentum instead of control. Each rep should be deliberate and smooth. If you’re rushing through hip circles or jerking into stretches, slow down and focus on the quality of movement through the full range.
Holding your breath during challenging positions creates tension exactly where you’re trying to release it. Breathe naturally and consistently. If you can’t maintain steady breathing, you’re probably pushing too hard.
Stop measuring your hip rotation against the person next to you in yoga class. Their running stride isn’t yours, and their mobility needs aren’t identical to yours either. Focus on improving your own baseline rather than matching someone else’s genetic advantages.
Finally, expecting dramatic changes after one week guarantees disappointment. Meaningful mobility improvements take consistent practice over weeks. Celebrate small wins like touching your toes an inch lower or feeling less stiff after long runs.
Starting a mobility practice is like opening a savings account for your running future. You’re not just working on today’s run, you’re building reserves of injury resistance, efficient movement, and longevity that compound over time. The beauty of this investment? The barrier to entry is incredibly low. Ten minutes after your run, three times per week, is enough to start seeing changes.
I’ll be honest with you: when I first committed to daily mobility work, I felt silly spending time on floor exercises when I could’ve been logging more miles. Six months later, I ran my first pain-free marathon in years. The chronic hip tightness that used to sideline me every training cycle? Gone. That’s not magic, it’s the cumulative effect of showing up consistently for movements that actually address how running affects your body.
Can I do mobility work on running days?
Absolutely. Dynamic mobility exercises work great as a warm-up before runs, while deeper stretches and slower movements are best saved for after running or on rest days when your muscles are warm.
Is mobility the same as stretching?
No. Mobility focuses on controlled movement through your full range of motion, while stretching typically means passively lengthening muscles. Mobility is active and functional, it trains your body to use that flexibility while moving.
How long before I see results?
Most runners notice easier warm-ups and reduced stiffness within two weeks. Measurable improvements in range of motion and running form typically appear after four to six weeks of consistent practice.
Do I need to do every exercise in the routine?
Start with the movements that address your specific tight spots, then gradually add others. A focused 10-minute session beats a rushed 30-minute routine you won’t stick with.
Can mobility replace strength training?
No. Mobility and strength work are complementary, mobility improves your movement quality, while strength provides the power and stability to support that movement during running.
Your next step is simple: try one hip mobility exercise after your next run. Just one. See how your body responds. Then build from there, adding movements as they become habit rather than chore. Your future running self will thank you for starting today.